“`html
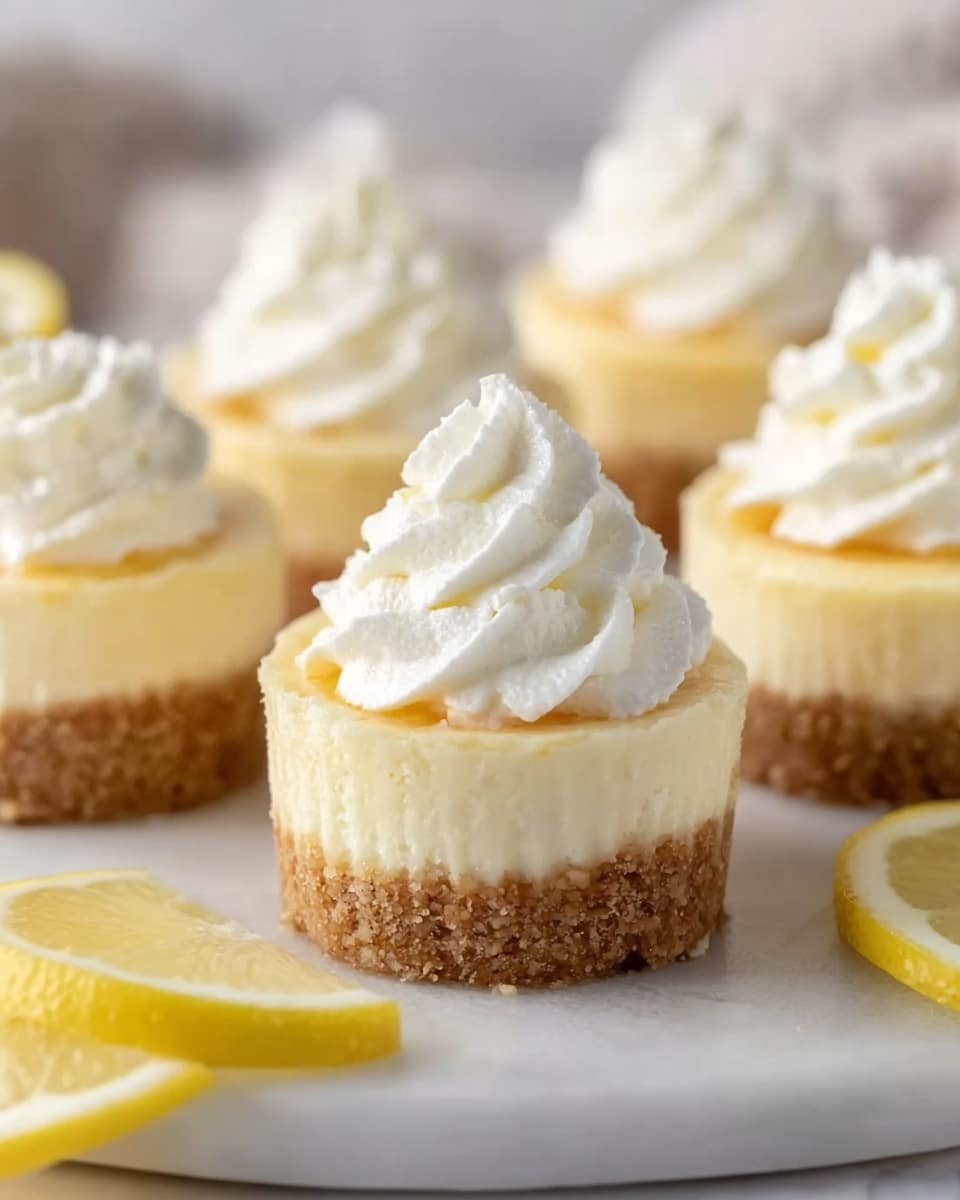
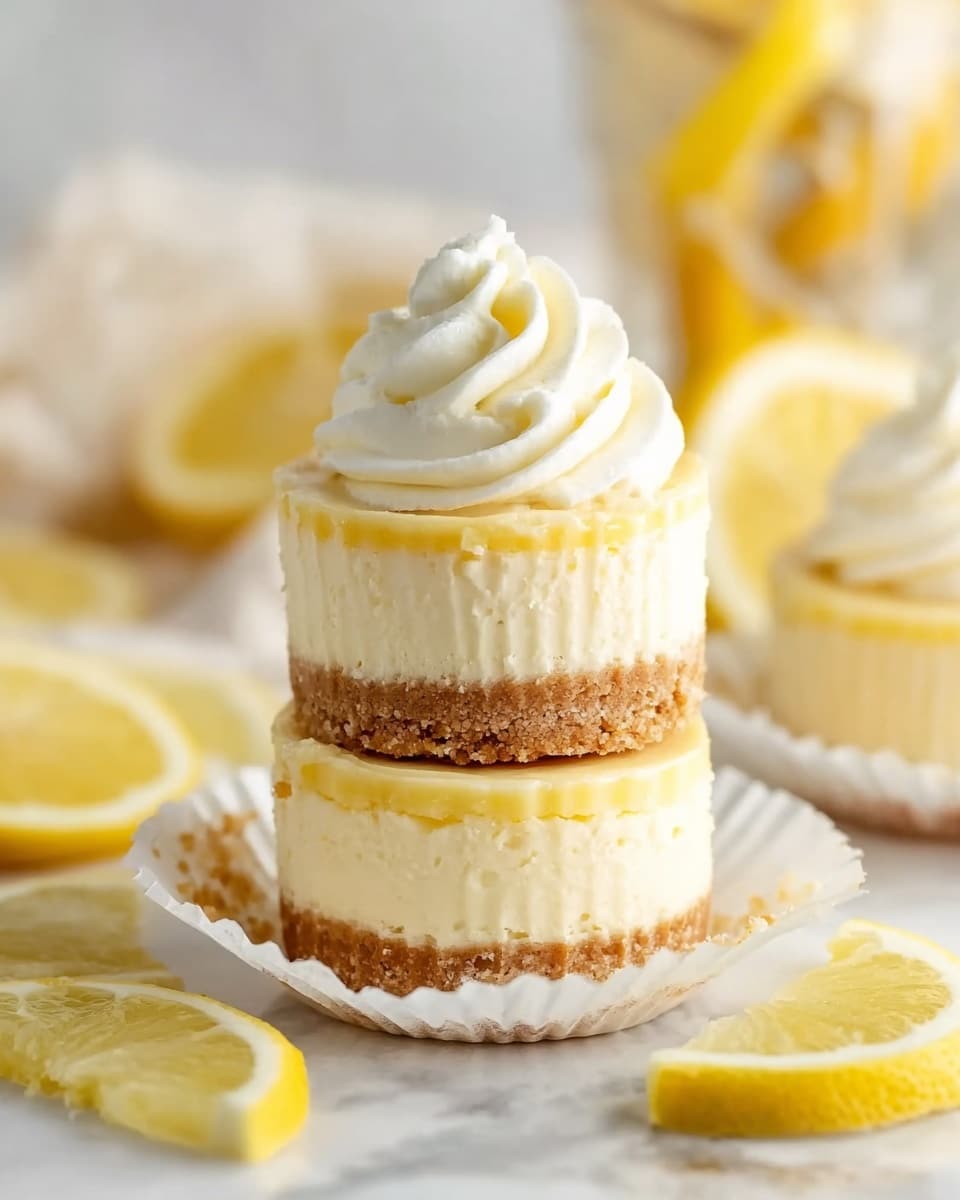
If you’re on the hunt for a dessert that perfectly balances tangy brightness with rich creaminess, let me introduce you to a game changer: the Mini Lemon Cheesecakes Recipe. These bite-sized delights bring together a buttery graham cracker crust with a velvety lemon-infused filling, finished off with a luscious crown of whipped cream and homemade lemon curd. They’re elegant enough for special occasions yet simple enough to make any ordinary day feel like a celebration. Get ready to fall in love with a little indulgence that’s bursting with sunshine and charm.
Ingredients You’ll Need
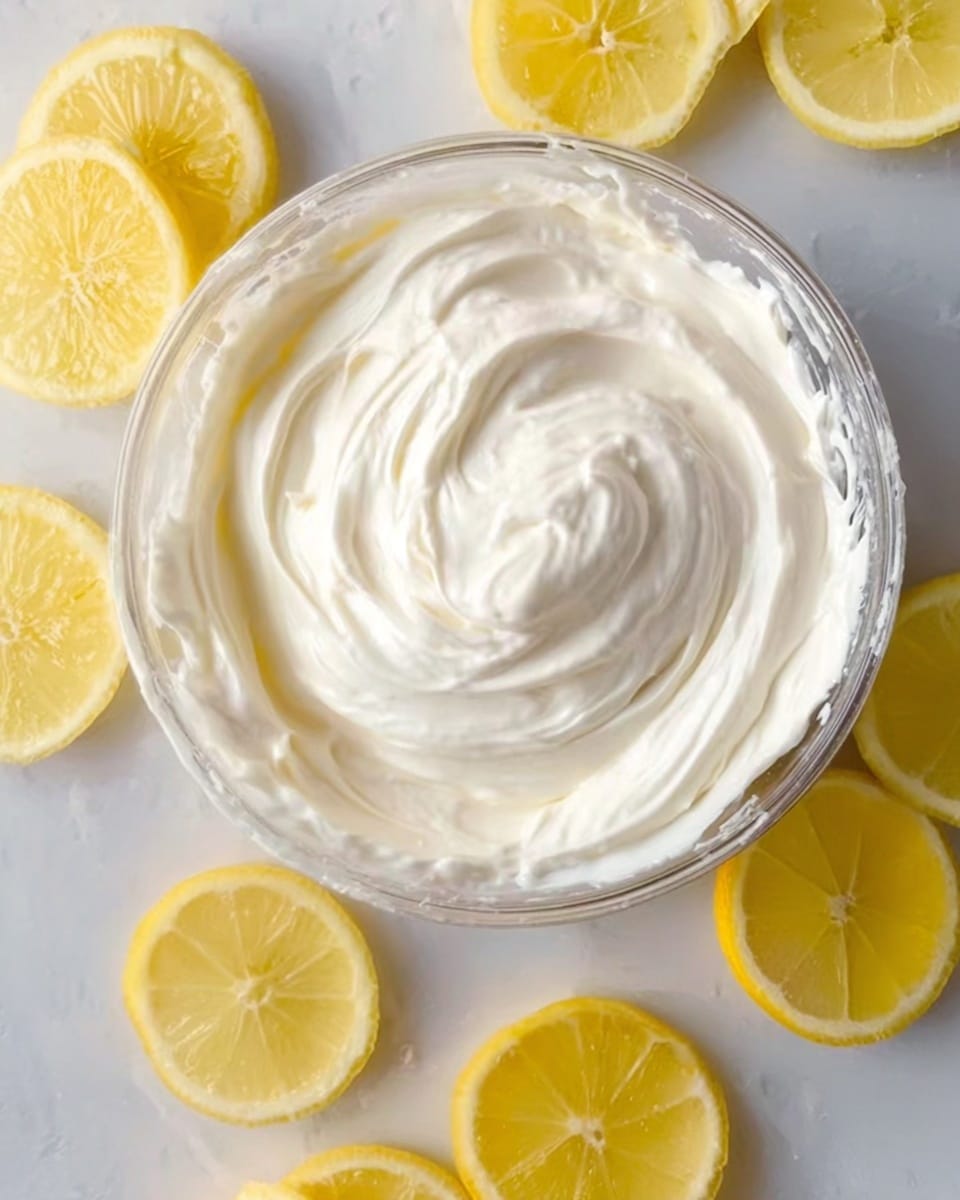
These ingredients are wonderfully straightforward but each one plays a vital role in creating that perfect balance of flavor, texture, and color in your mini lemon cheesecakes. From the graham cracker crumbs that form a crisp, flavorful base to the fresh lemon juice that brings a zingy, fresh note, everything works together beautifully.
- Graham cracker crumbs (1 ¼ cups/112g): Provides a buttery, crunchy crust that contrasts the smooth cheesecake perfectly.
- Unsalted butter (3 tablespoons/43g), melted: Binds the crust crumbs together and adds a rich, creamy note to the base.
- Full-fat cream cheese (16 ounces/452g), room temperature: The heart of the cheesecake, delivering that rich, creamy texture.
- Granulated sugar (¼ cup/48g): Sweetens the batter just enough to complement the lemon without overpowering it.
- Sour cream (½ cup/120g), room temperature: Adds a subtle tang and keeps the filling luscious and moist.
- Lemon zest (2 tablespoons): Gives a vibrant citrus aroma and bright flavor throughout.
- Lemon juice (2 tablespoons/30ml): Imparts fresh acidity that perfectly balances the sweetness.
- Lemon extract (1 teaspoon/5ml): Enhances and deepens the lemon flavor for a true citrus burst.
- Large eggs (2), room temperature: Bind the filling ingredients firmly while keeping it tender and smooth.
For the optional toppings:
- Heavy whipping cream (1 cup/236ml): Whips into light, fluffy clouds of whipped cream for a dreamy finish.
- Powdered sugar (½ cup/65g): Sweetens the whipped cream delicately without graininess.
- Lemon curd (2/3 cup/213g): Adds a glossy, tangy topping that amps up the lemon flavor beautifully.
How to Make Mini Lemon Cheesecakes Recipe
Step 1: Prepare Your Oven and Crust
Preheat your oven to 350°F (175°C) and line a cupcake pan with baking liners to make removal easy and mess-free. Blitz the graham crackers into fine crumbs using a food processor or blender, then mix thoroughly with the melted butter until every crumb is coated and holds together like wet sand—the perfect crust mixture.
Step 2: Form the Crust Base in Your Liners
Place a heaping tablespoon of the crust mixture into each cupcake liner, then press firmly with the back of a spoon to create an even base. This crust will bake up crispy and golden, providing a sturdy and flavorful foundation for your creamy filling. Set the pan aside while you prepare the filling.
Step 3: Whip Up the Creamy Lemon Filling
In a large bowl, beat the cream cheese and sugar until smooth and lump-free—this step ensures your cheesecake filling is perfectly silky. Add in the sour cream, lemon zest, juice, and lemon extract, mixing well after each addition so the flavors blend beautifully into one hemisphere of fresh and tangy delight.
Step 4: Finish the Filling Batter
Beat in the eggs one at a time until the mixture shines with a smooth, luscious consistency. Eggs not only set the cheesecake but also help it maintain a tender, creamy texture that melts on your tongue.
Step 5: Fill and Bake Your Cheesecakes
Spoon the luscious batter into the prepared cupcake liners using a large cookie scoop or a ¼ cup measuring cup—almost to the brim but leaving just a little room on top for any rise during baking. Bake the mini lemon cheesecakes at 350°F for 15 to 18 minutes until the centers are still slightly jiggly—this ensures they stay moist and creamy once cooled.
Step 6: Cool and Chill Before Serving
Allow your mini cheesecakes to cool completely in the pan, then transfer them to the refrigerator. A minimum chill of two hours is essential to help them set firmly and develop their full flavor profile. Keep them stored in an airtight container to maintain freshness.
Step 7: Optional Toppings for the Wow Factor
When ready to serve, add a dollop of homemade lemon curd on each mini cheesecake for an extra burst of tang. For the whipped cream, chill your mixing bowl and whisk attachment, then beat the heavy cream on medium-high speed until soft peaks form. Gradually add powdered sugar and continue beating until stiff peaks form. Pipe or spoon the fluffy whipped cream atop each cheesecake for an elegant and irresistible finish.
How to Serve Mini Lemon Cheesecakes Recipe
Garnishes
These mini lemon cheesecakes shine beautifully when garnished simply. A fresh mint leaf or a thin lemon twist adds a pop of color and complements the citrusy notes perfectly. Dollops of lemon curd or fresh berries like raspberries and blueberries also make stunning, flavorful touches that elevate the dessert’s presentation and taste.
Side Dishes
While these mini treats are delightful on their own, serving them alongside light, refreshing sides like a berry salad or a citrus sorbet enhances their bright lemon profile. For gatherings, consider pairing them with iced herbal teas or a crisp, chilled Prosecco to bring out their zesty sparkle.
Creative Ways to Present
For a stunning presentation, try serving these mini lemon cheesecakes on a tiered dessert stand or arrange them on a colorful platter with edible flowers scattered around for that extra celebratory feel. You can also personalize each with edible gold leaf or a dusting of powdered sugar for a delicate, festive touch that will leave your guests impressed.
Make Ahead and Storage
Storing Leftovers
Mini lemon cheesecakes keep wonderfully in the refrigerator when stored in an airtight container. They stay fresh and creamy for up to four days, making them an excellent make-ahead option for parties or weeknight treats.
Freezing
You can freeze these cheesecakes to enjoy later: place them on a baking sheet to freeze individually before wrapping tightly in plastic wrap and placing them in a freezer bag. They’ll hold well for up to one month. When ready to eat, thaw them in the refrigerator overnight to maintain their creamy texture.
Reheating
Since these are best enjoyed chilled, reheating isn’t necessary or recommended. If you prefer them slightly less cold, allow cheesecakes to sit at room temperature for about 15 minutes before serving—this softens the texture without compromising their flavor or form.
FAQs
Can I use low-fat cream cheese in the Mini Lemon Cheesecakes Recipe?
While low-fat cream cheese can be used, full-fat cream cheese delivers a richer, creamier texture and more indulgent flavor, which is key to this recipe’s signature smoothness. Low-fat versions may result in a slightly less creamy cheesecake.
Is it necessary to use both lemon zest and lemon extract?
Yes, using both enhances the lemon flavor in complementary ways: the zest adds fresh, natural citrus oils and texture, while the extract provides an intense lemon aroma and depth, making the flavor more vibrant.
Can I make the Mini Lemon Cheesecakes Recipe dairy-free?
With some substitutions like dairy-free cream cheese and coconut cream in place of sour cream and heavy cream, you can make a dairy-free version. Keep in mind the texture and taste may differ slightly from the original, but it will still be delicious.
Why do the centers need to be slightly jiggly when baking?
This ensures the cheesecakes remain creamy, not overbaked or dry. They firm up as they cool and chill, so a little jiggle indicates they are perfectly cooked through while still silky.
What’s the best way to remove the cheesecakes from the liners?
Let them chill completely before trying to remove them. Gently peel away the liner or pop them out by pressing underneath. If the liners stick, a thin offset spatula can help loosen the edges without damaging your mini cheesecakes.
Final Thoughts
Nothing beats the satisfying joy of biting into these bright, luscious mini lemon cheesecakes, especially when shared with friends or family. This Mini Lemon Cheesecakes Recipe is not only approachable but endlessly delightful—perfect for summer gatherings or any time you need a little sunshine on your plate. Go ahead, give it a try and watch your dessert game soar to new heights!
“`
Print
Mini Lemon Cheesecakes Recipe
- Prep Time: 30 minutes
- Cook Time: 15 minutes
- Total Time: 3 hours 45 minutes
- Yield: 15-16 mini cheesecakes
- Category: Dessert
- Method: Baking
- Cuisine: American
Description
These Mini Lemon Cheesecakes are smooth, creamy, and perfectly bite-sized, making them an ideal summer dessert. Featuring a crunchy graham cracker crust, a tangy lemon-infused cream cheese filling, and optional toppings of homemade lemon curd and whipped cream, these cheesecakes are both refreshing and indulgent. Perfectly baked and chilled to set, they offer a delightful balance of sweet and tart flavors.
Ingredients
Crust
- 1 ¼ cups (112g) Graham cracker crumbs
- 3 tablespoons (43g) unsalted butter, melted
Cheesecake Filling
- 16 ounces (452g) full-fat cream cheese, at room temperature
- ¼ cup (48g) granulated sugar
- ½ cup (120g) sour cream, at room temperature
- 2 tablespoons lemon zest
- 2 tablespoons (30ml) lemon juice
- 1 teaspoon (5ml) lemon extract
- 2 large eggs, at room temperature
Toppings (Optional)
- 1 cup (236ml) heavy whipping cream
- ½ cup (65g) powdered sugar
- 2/3 cup (213g) lemon curd
Instructions
- Preheat and Prepare Pan: Preheat your oven to 350°F (175°C). Line a cupcake pan with baking liners to ensure easy removal and clean-up.
- Make the Crust: Using a food processor or blender, grind the graham crackers into fine crumbs. In a bowl, combine the crumbs with melted butter and stir until evenly mixed. Spoon about 1 heaping tablespoon of this mixture into each cupcake liner and press down firmly with a spoon to form the crust base. Set aside.
- Mix Cream Cheese and Sugar: In a mixing bowl, beat the cream cheese and granulated sugar together until smooth and lump-free. Scrape down the sides of the bowl as necessary to ensure even mixing.
- Add Sour Cream and Lemon Flavorings: Beat in sour cream, lemon zest, lemon juice, and lemon extract until the mixture is well combined and fragrant.
- Incorporate Eggs: Add the eggs one at a time, beating thoroughly after each addition until the batter is smooth and cohesive.
- Scoop Batter into Liners: Using a large cookie scoop or a ¼ cup measuring cup, fill each prepared crust-lined cupcake liner nearly full, leaving about ¼ inch of space at the top.
- Bake: Place the pan in the preheated oven and bake for 15-18 minutes. The centers should remain slightly jiggly when done.
- Cool and Chill: Remove the cheesecakes from the oven and allow them to cool completely in the pan. Once cooled, refrigerate them for at least 2 hours before serving to let them set properly.
- Prepare Toppings: If using, start by chilling the mixing bowl and whisk attachment in the freezer for 5-10 minutes. Pour the heavy whipping cream into the chilled bowl, then beat on medium-high speed until soft peaks form. Gradually add powdered sugar and continue beating on high until stiff peaks develop. Keep chilled until ready to serve.
- Serve: Before serving, add a dollop of lemon curd on each cheesecake, then pipe or spoon the whipped cream on top for a finished look and extra flavor.
Notes
- Ensure all dairy ingredients are at room temperature to create a smooth, lump-free batter.
- Do not overbake; the center should be slightly jiggly to maintain creaminess after chilling.
- Store cheesecakes in an airtight container in the refrigerator and consume within 3 days for optimal freshness.
- For a gluten-free version, substitute graham cracker crumbs with gluten-free crackers or almond flour crumbs.
- Lemon extract enhances the lemon flavor but can be omitted if unavailable, with a slight increase in lemon juice for flavor balance.

