“`html
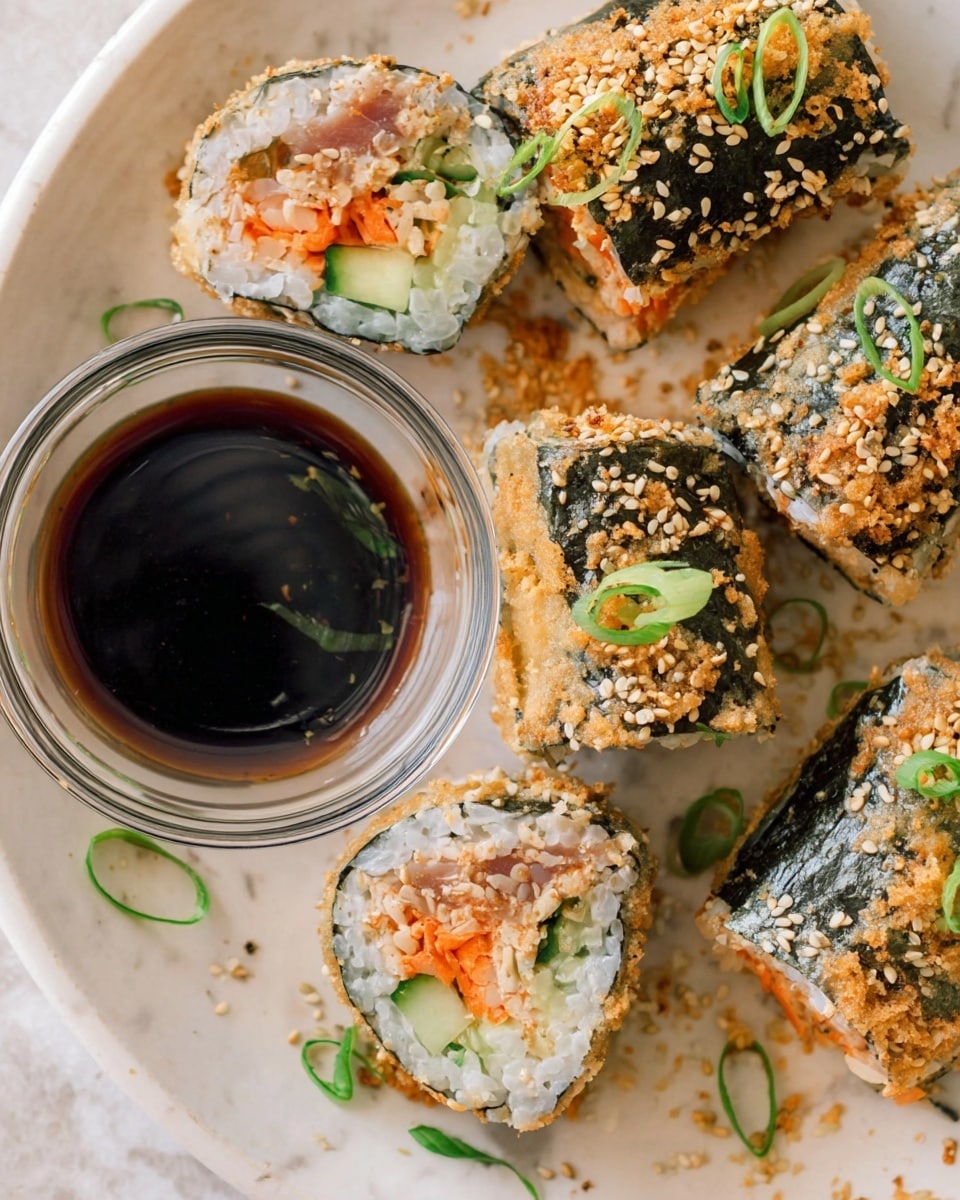
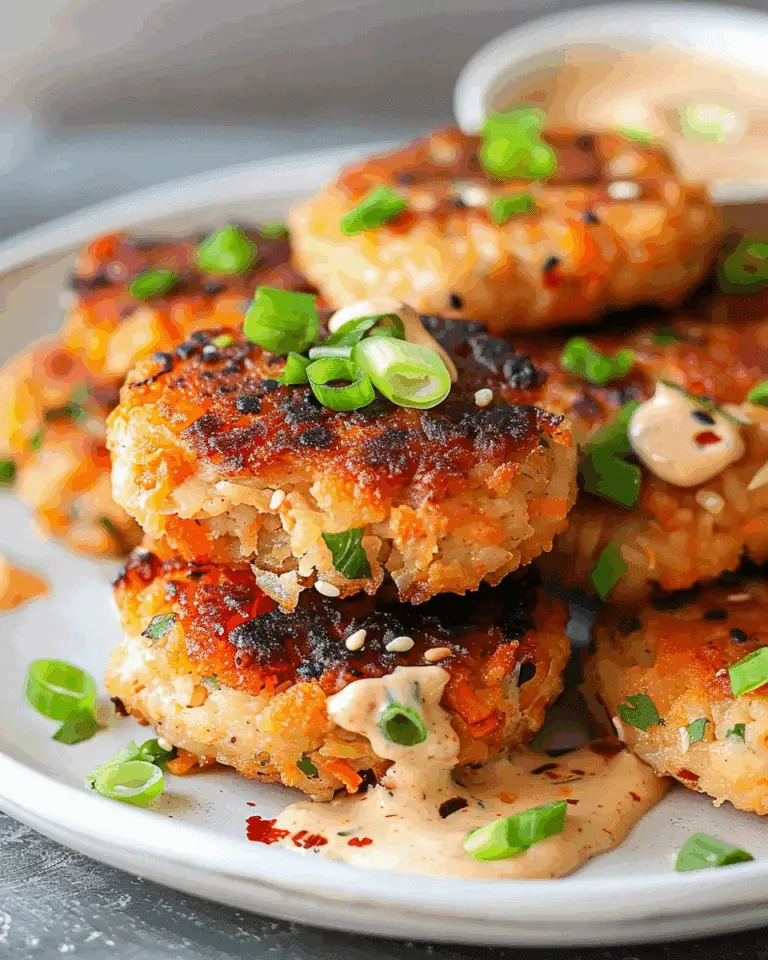
If you’ve ever wished for a sushi experience that’s delightfully crispy, gloriously gluten-free, and incredibly simple to whip up at home, then the Crispy Rice Paper Sushi Rolls (Gluten-Free & Easy) Recipe is exactly what you need. This fresh take on traditional sushi swaps out seaweed for delicate rice paper that crisps up beautifully when pan-fried, creating a fun contrast between tender fillings and a satisfyingly crunchy exterior. It’s an absolute crowd-pleaser that brings together vibrant textures and bold flavors, perfect for impressing friends or sneaking extra veggies into a loved one’s meal. Trust me, once you try these rolls, sushi night will never be the same again!
Ingredients You’ll Need

Gathering the right ingredients for this recipe is easier than you might think, and each one plays a vital role in crafting those perfect Crispy Rice Paper Sushi Rolls (Gluten-Free & Easy) Recipe. From the sticky sushi rice that holds everything together, to the creamy, spicy tuna adding that savory kick, every element contributes texture, color, and taste to the final masterpiece.
- Sushi Rice: Use 2 cups of cooked short grain rice, warmed, for that sticky, authentic sushi texture.
- Rice Vinegar: 2 tablespoons to give the rice its signature mild tang and subtle sweetness.
- Sugar: 1 teaspoon to balance out the vinegar’s acidity perfectly.
- Sea Salt: Just half a teaspoon to enhance all the flavors harmoniously.
- Canned Tuna: 10 ounces of drained tuna forms the hearty, protein-packed center of your rolls.
- Kewpie Mayo: 3 to 4 tablespoons for that irresistibly creamy texture; adds richness and blends beautifully with sriracha.
- Sriracha: 1 tablespoon brings the ideal spicy zing to elevate the tuna mixture.
- Rice Paper Sheets: 8 sheets, about 8 inches in diameter, which transform into the crisp golden shell once pan-fried.
- Toasted Nori Sheet Snacks: 16 pieces to sprinkle inside for an umami burst without overwhelming the rice paper.
- Persian Cucumbers: Thinly sliced for fresh crunch and a cool, crisp contrast.
- Grated Carrot: 1 cup adds sweetness, color, and a delightful crunch.
- Avocado: Thinly sliced, lending creamy, buttery notes that balance spice and texture.
- Toasted Sesame Seeds: For rolling the sushi, adding a nutty flavor and extra crunch on the outside.
- Avocado Oil: Used for pan frying, it gives a lovely golden color and light crisp without overpowering the rolls.
- Soy Sauce or Tamari: 2 tablespoons for dipping; tamari keeps it gluten-free-friendly.
- Wasabi (optional): Half a teaspoon for those who love an extra kick with their dipping sauce.
How to Make Crispy Rice Paper Sushi Rolls (Gluten-Free & Easy) Recipe
Step 1: Prepare the Sushi Rice
Start by mixing cooked short grain rice with rice vinegar, sugar, and sea salt in a bowl. This careful blend creates the sweet and tangy sushi rice base that holds your rolls together and delivers the classic sushi flavor. Set it aside to let all the flavors marry beautifully.
Step 2: Make the Spicy Tuna Filling
Combine canned tuna with Kewpie mayo and sriracha for that creamy, spicy filling. Adjust the mayo amount if you like your rolls extra creamy, because this filling is the flavor star that gives each bite a kick with balanced creaminess.
Step 3: Soften and Prepare the Rice Paper
Dip each rice paper sheet into a shallow bowl of cold water briefly until pliable but not soggy, then gently place it on a moist cutting board ready for your fillings. This technique ensures the rice paper will be easy to roll without tearing while retaining enough structure for crisping later.
Step 4: Layer the Filling
Place a piece of toasted nori towards the lower half of the softened rice paper, then add a quarter cup of the sushi rice on top. Scatter shredded carrot, a spoonful of spicy tuna, fresh cucumber slices, creamy avocado, and another piece of toasted nori in layers. This combination creates a vibrant, flavorful cross-section inside each roll.
Step 5: Roll It Up
Bring the bottom portion of the rice paper up to cover the fillings partially, fold the sides in neatly, and roll away from you until the roll is fully wrapped. The elasticity of the rice paper helps trap all those delicious ingredients tightly inside, making for easy eating and frying.
Step 6: Coat with Sesame Seeds
Spread toasted sesame seeds onto a plate and roll each sushi roll through them to cover the exterior gently. This adds a toasty, nutty flavor and texture that complements the crispy outside once cooked.
Step 7: Pan-Fry to Perfection
Heat a nonstick skillet with a thin layer of avocado oil over medium-low heat. Cook the sushi rolls in batches for about 3 minutes per side, turning carefully until they develop an irresistible golden-brown crust. This step is where those Crispy Rice Paper Sushi Rolls (Gluten-Free & Easy) Recipe truly come alive with crunch and warmth.
Step 8: Serve with a Dipping Sauce
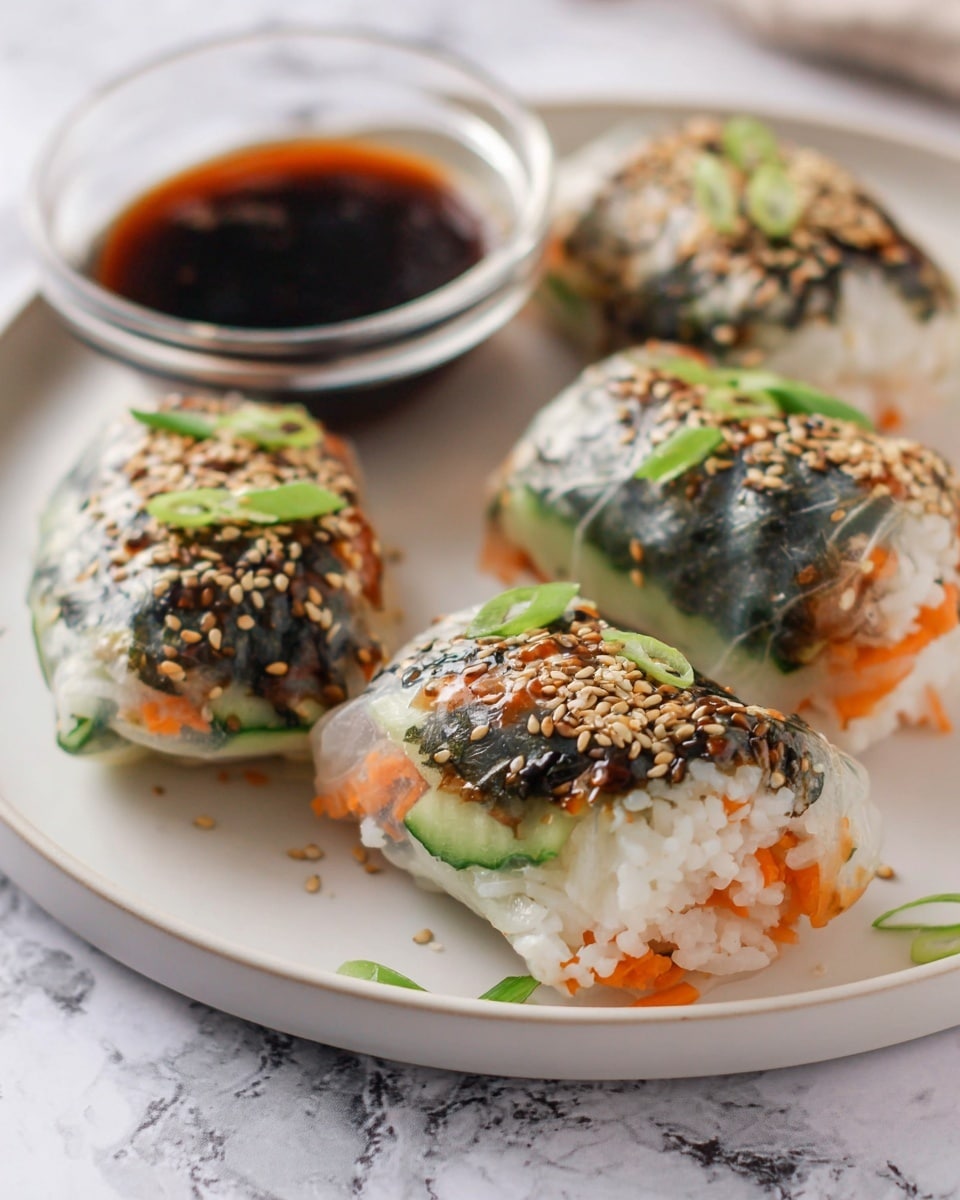
Offer soy sauce or tamari mixed with a touch of wasabi (if you like) alongside your rolls. The salty, pungent dip beautifully enhances the rolls’ flavors and provides a classic sushi accompaniment.
How to Serve Crispy Rice Paper Sushi Rolls (Gluten-Free & Easy) Recipe
Garnishes
Sprinkle additional toasted sesame seeds on top of each roll for an elegant finish. Thinly sliced fresh scallions or a small drizzle of spicy mayo also add color and extra flavor, making these sushi rolls even more irresistible at the table.
Side Dishes
Pair your rolls with a simple seaweed salad or a crisp cucumber salad dressed lightly in rice vinegar and sesame oil for a refreshing contrast. Miso soup or pickled ginger work wonderfully too, bringing even more variety to your gluten-free sushi feast.
Creative Ways to Present
Serve the sushi rolls on a bamboo sushi mat or decorative plate to give your meal an authentic vibe. Cutting the rolls into bite-sized pieces and arranging them like a sushi platter makes them perfect for entertaining, sharing, or enjoying as a light meal.
Make Ahead and Storage
Storing Leftovers
If you have any leftover Crispy Rice Paper Sushi Rolls (Gluten-Free & Easy) Recipe, wrap them tightly in plastic wrap or place them in an airtight container and keep them in the refrigerator. They are best eaten within a day to maintain that delightful crispness and freshness of the fillings.
Freezing
Freezing is not recommended for these sushi rolls since the rice paper’s crisp texture and fresh vegetables do not freeze well and may become soggy or mushy upon thawing.
Reheating
For best results when reheating, gently warm the rolls in a nonstick pan over low heat just until heated through to help maintain as much crispiness as possible. Avoid microwaving to keep the rice paper from becoming chewy or tough.
FAQs
Can I use other fillings besides tuna in this Crispy Rice Paper Sushi Rolls (Gluten-Free & Easy) Recipe?
Absolutely! Feel free to experiment with cooked shrimp, smoked salmon, tofu, or even roasted veggies. The rice paper and sushi rice base pairs well with a wide variety of fillings, so customize to your heart’s content.
Is rice paper sushi a traditional sushi style?
Rice paper sushi rolls are a modern twist inspired by Vietnamese spring rolls, offering a gluten-free alternative to traditional nori rolls. The crispy pan-fried rice paper adds a unique texture and flavor that’s not typical in classic sushi.
What if I don’t have Kewpie mayo? Can I substitute it?
Yes, regular mayonnaise works fine as a substitute, though Kewpie mayo has a slightly sweeter, richer flavor that complements sushi well. Feel free to adjust sriracha levels to keep that perfect spicy balance.
Can I make these rolls vegan or vegetarian?
Definitely! Replace tuna with marinated tempeh, seasoned chickpeas, or thin strips of grilled vegetables. Swap mayo for vegan mayo to keep things plant-based and still delightfully creamy.
How do I prevent the rice paper from tearing when soaking?
Dip the rice paper in cold water just until it becomes flexible but not overly soft; this usually takes around 5–10 seconds. Working quickly and placing it on a moist surface helps manage the delicate texture so it won’t tear during rolling.
Final Thoughts
There’s something truly magical about these Crispy Rice Paper Sushi Rolls (Gluten-Free & Easy) Recipe—they take sushi night to a new level with irresistible crunch, vibrant flavors, and a totally foolproof method. Whether you’re feeding family, impressing friends, or just treating yourself, this recipe is guaranteed to become a fast favorite in your kitchen. So grab those ingredients, roll up your sleeves, and dive into this delicious adventure—you’ll wonder why you didn’t try it sooner!
“`
Print
Crispy Rice Paper Sushi Rolls (Gluten-Free & Easy) Recipe
- Prep Time: 20 minutes
- Cook Time: 6 minutes
- Total Time: 26 minutes
- Yield: 8 sushi rolls
- Category: Appetizer
- Method: Frying
- Cuisine: Japanese-inspired
- Diet: Gluten Free
Description
These Rice Paper Sushi Rolls are a crispy, easy-to-make, and gluten-free twist on traditional sushi. Made with warm sushi rice, spicy tuna, fresh veggies, and wrapped in rice paper instead of seaweed, they offer a deliciously crunchy exterior when pan-fried to golden perfection. Perfect for a quick lunch or snack that kids and adults alike will enjoy, these sushi rolls combine bold flavors and a satisfying texture without the fuss of bamboo mats or seaweed sheets.
Ingredients
Sushi Rice
- 2 cups cooked short grain rice, warmed
- 2 tbsp rice vinegar
- 1 tsp sugar
- 1/2 tsp sea salt
Spicy Tuna
- 10 oz canned tuna, drained
- 3–4 tbsp Kewpie mayo, or any mayo
- 1 tbsp sriracha
Sushi Rolls
- 8 sheets rice paper, 8 inch (22 cm) diameter
- 16 pieces toasted nori sheet snack
- 2 Persian cucumbers, thinly sliced
- 1 cup grated carrot
- 1 avocado, thinly sliced
- Toasted sesame seeds, for garnish
- Avocado oil, for pan frying
Dipping Sauce
- 2 tbsp soy sauce, or tamari sauce for gluten free
- 1/2 tsp wasabi, optional
Instructions
- Prepare Sushi Rice: In a bowl, combine the warmed cooked short grain rice with rice vinegar, sugar, and sea salt. Stir well to evenly incorporate all ingredients and set aside to let the flavors meld.
- Make Spicy Tuna: In a separate bowl, mix together the drained canned tuna, Kewpie mayo, and sriracha. Adjust mayo quantity if you prefer a creamier texture.
- Soften Rice Paper: Fill a shallow, wide bowl with cold water. Dip one rice paper sheet into the water to soften, then carefully place it on a moist cutting board.
- Assemble Rolls: Place two pieces of toasted nori sheet snack toward the bottom half of the softened rice paper. Spread 1/4 cup of the prepared sushi rice over the nori, then add 2 tablespoons of grated carrot and 2 tablespoons of the spicy tuna mixture on top.
- Add Fresh Veggies: Layer thin slices of cucumber and avocado over the filling, then top with another toasted nori sheet piece.
- Roll Sushi: Fold the bottom edge of the rice paper up to cover part of the filling, fold the sides inward to enclose the filling, then roll tightly away from you to seal the roll fully.
- Coat with Sesame: Spread toasted sesame seeds onto a plate. Roll each sushi roll on the sesame seeds to coat all sides, then transfer to a parchment paper lined plate or baking sheet to prevent sticking. Repeat the assembly for remaining rolls.
- Pan-Fry Rolls: Heat a nonstick skillet over medium-low heat and add a thin layer of avocado oil. Place the sushi rolls in a single layer without crowding. Cook for 3 minutes on each side until golden and crispy, working in two batches if necessary.
- Serve: Remove the crispy sushi rolls from the skillet and serve immediately with soy sauce or tamari dipping sauce mixed optionally with wasabi.
Notes
- Use warm sushi rice for easier spreading and better texture.
- If you prefer less spice, reduce sriracha in the spicy tuna mixture.
- Ensure rice paper sheets don’t over-soak to avoid tearing during rolling.
- Avocado oil is recommended for frying due to its high smoke point and mild flavor.
- These rolls are best enjoyed fresh but can be refrigerated for a few hours; reheat gently to maintain crispness.
- For a vegan alternative, substitute spicy tuna with mashed tofu or seasoned chickpeas.
- To make it gluten-free, confirm soy sauce or tamari used is certified gluten-free.

