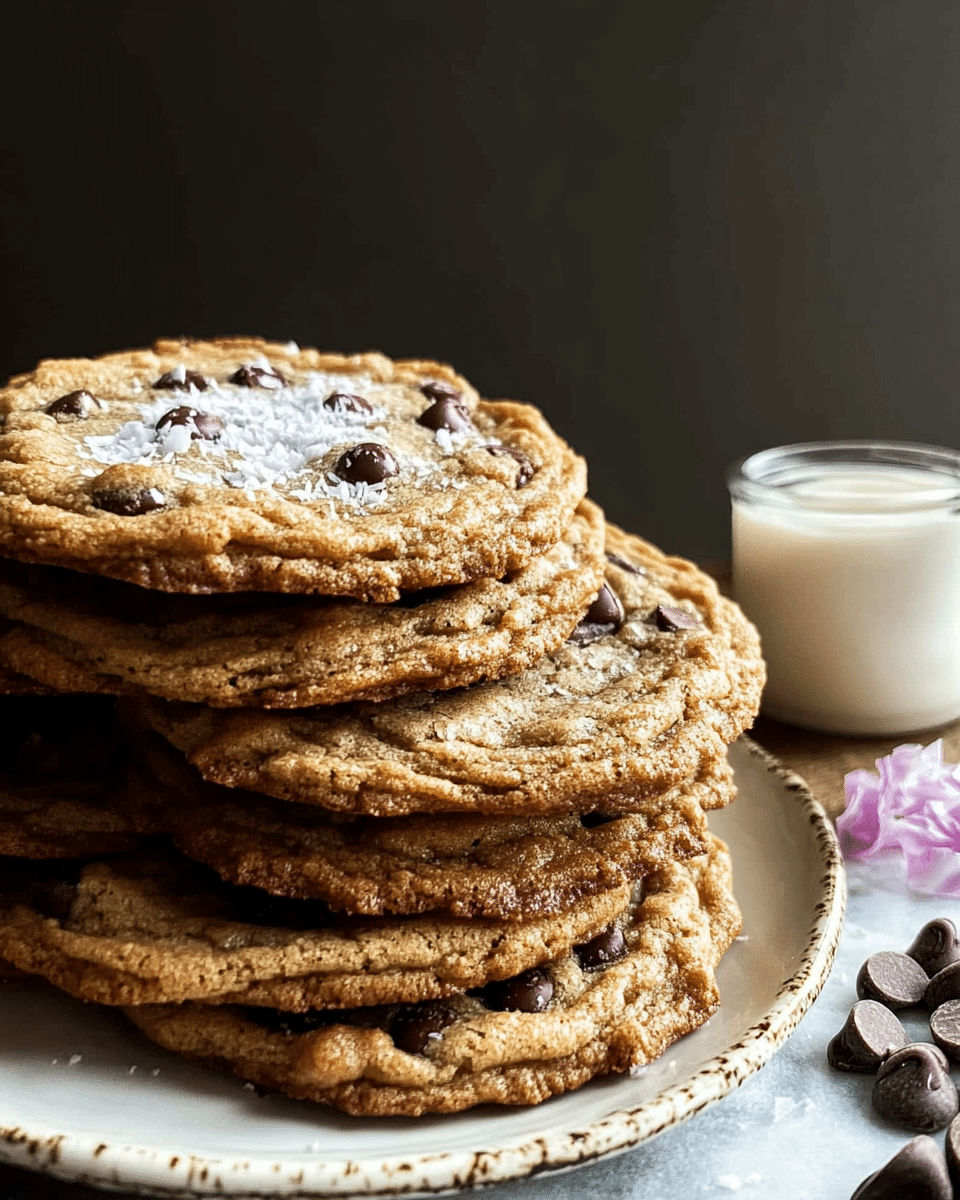
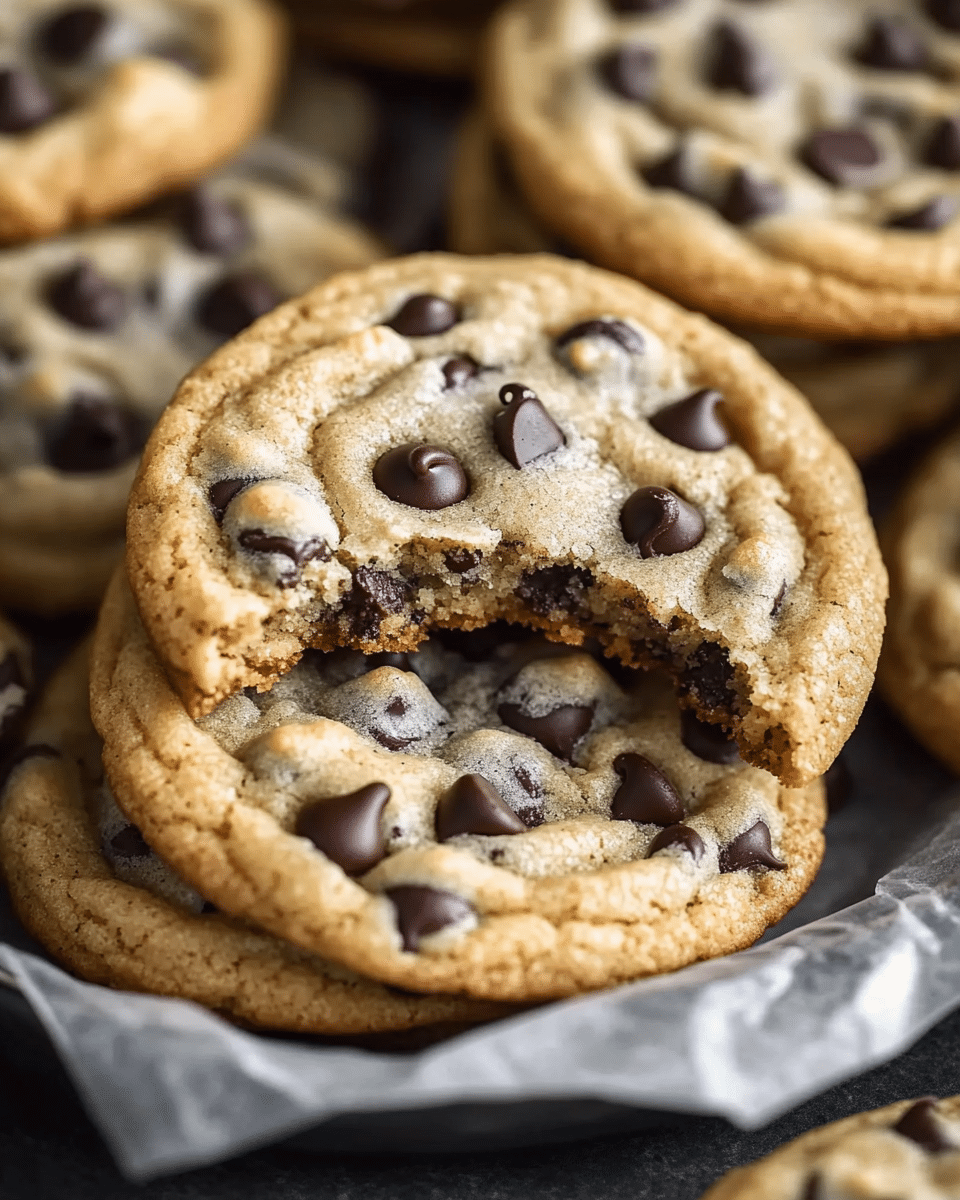
These Pan-Banging Chocolate Chip Cookies are a game changer in the world of homemade cookies. With their crisp edges, chewy centers, and irresistible gooey chocolate chunks, they’re sure to become a favorite. The pan-banging technique gives them a professional bakery-quality texture, making them thick, soft, and perfectly shaped with the ideal balance of crunch and chew.
Why You’ll Love This Recipe
These cookies are everything you want in a chocolate chip cookie—rich, chewy, and full of flavor. The pan-banging method ensures perfectly crisp edges while the centers remain soft and gooey. Plus, with big, chunky pieces of chocolate in every bite, they’re a treat no one can resist. Whether you’re baking for a special occasion or just to satisfy a sweet tooth, these cookies will exceed expectations.
Ingredients
-
2 cups all-purpose flour (fluffed then leveled)
-
1/2 tsp baking soda
-
3/4 tsp salt
-
1 cup (2 sticks) unsalted butter, room temperature
-
1 1/2 cups granulated sugar
-
1/3 cup packed light brown sugar
-
1 large egg
-
1 large egg yolk
-
2 tsp pure vanilla extract
-
2 tbsp water
-
8 oz semi-sweet chocolate, chopped into bite-sized pieces (averaging 1/2 inch, some smaller, some larger)
-
Flaky sea salt for garnish
(Tip: You’ll find the full list of ingredients and measurements in the recipe card below.)
Directions
-
Preheat the oven:
Adjust an oven rack to the middle position and preheat the oven to 350°F (175°C). Line 3 baking sheets with parchment paper or silicone baking mats. -
Mix dry ingredients:
In a small bowl, whisk together the flour, baking soda, and salt. -
Cream the butter and sugars:
In the bowl of a stand mixer fitted with a paddle attachment, beat the butter on medium speed until creamy. Add the granulated sugar and brown sugar, and beat on medium-high speed until light and fluffy, about 2–3 minutes. -
Add wet ingredients:
Add the egg, egg yolk, vanilla extract, and water to the butter-sugar mixture. Mix on low speed until combined. -
Combine dry and wet ingredients:
Gradually add the flour mixture to the wet ingredients, mixing on low speed until just combined. -
Stir in the chocolate:
Stir in the chopped semi-sweet chocolate chunks until evenly distributed throughout the dough. -
Form dough balls:
Form the dough into 3 1/2-ounce balls (about a heaping 1/3 cup each) and place them on the prepared baking sheets. Space the dough balls evenly apart. You’ll need to place 4 dough balls per baking sheet. -
Chill the dough:
Transfer the baking sheets with the dough balls to the freezer and chill for at least 15 minutes before baking. -
Bake the cookies:
Place one chilled baking sheet in the preheated oven and bake for 10 minutes, or until the cookies are slightly puffed in the center. -
Create the ridges:
Carefully lift the side of the baking sheet about 4 inches and gently let it drop down against the oven rack, so the edges of the cookies set and the inside falls back down. Repeat this lifting and dropping process a few times to create ridges around the edge of the cookie. -
Cool and garnish:
Let the cookies cool on the baking sheets for a few minutes before transferring to a wire rack. Garnish with flaky sea salt.
Servings and Timing
-
Servings: 12 cookies
-
Prep time: 10 minutes
-
Cook time: 16 minutes
-
Chill time: 15 minutes
-
Total time: 41 minutes
Variations
-
Add-ins: Add nuts like walnuts or pecans for extra crunch and flavor.
-
Dark Chocolate: Swap out the semi-sweet chocolate for dark chocolate for a richer taste.
-
Flavor Boost: Add a pinch of cinnamon or a splash of espresso powder to enhance the flavor of the chocolate.
Storage & Reheating Tips
-
Storage: Store leftover cookies in an airtight container at room temperature for up to 4 days.
-
Reheating: Reheat in the microwave for 10–15 seconds for a warm, gooey experience.
FAQs
1. Can I use different types of chocolate for these cookies?
Yes, you can use milk chocolate, dark chocolate, or even white chocolate, depending on your preference. Just be sure to chop the chocolate into bite-sized chunks.
2. Do I have to use the pan-banging technique?
While the pan-banging technique helps to create those signature cookie ridges and chewy centers, you can still bake the cookies without it. They will just be less defined in texture.
3. Can I freeze the dough for later use?
Yes, you can freeze the dough balls before baking. Place them on a baking sheet, freeze until solid, and then transfer them to a freezer bag. When ready to bake, simply bake from frozen, adding a few extra minutes to the bake time.
4. Can I use a hand mixer instead of a stand mixer?
Yes, you can use a hand mixer instead of a stand mixer. Just make sure to beat the butter and sugars until light and fluffy, and follow the rest of the instructions as directed.
5. How do I know when the cookies are done?
The cookies are done when they are slightly puffed in the center and golden around the edges. The pan-banging technique will also help to set the edges and create a distinct texture.
6. Can I use margarine instead of butter?
While you can use margarine, butter will give these cookies a richer flavor and better texture. For best results, stick with unsalted butter.
7. Can I make these cookies smaller or larger?
Yes, you can adjust the size of the dough balls to make smaller or larger cookies. Just keep in mind that the baking time will vary. Smaller cookies will bake faster, while larger ones will take longer.
8. Can I add more sugar for extra sweetness?
If you like your cookies sweeter, feel free to add a little more granulated or brown sugar. Just be cautious, as too much sugar can affect the texture of the dough.
9. How do I prevent the cookies from spreading too much?
Chilling the dough is key to preventing excessive spreading. If you’re having trouble with spread, you can also refrigerate the dough longer before baking.
10. Can I use gluten-free flour for these cookies?
Yes, you can use a 1:1 gluten-free flour blend in place of all-purpose flour. However, this may slightly affect the texture of the cookies.
Conclusion
These Pan-Banging Chocolate Chip Cookies are a perfect balance of crisp edges and chewy centers, with gooey chocolate in every bite. The simple yet effective pan-banging technique creates cookies with a bakery-worthy texture right in your own kitchen. Whether you’re baking for a crowd or just indulging in a sweet treat, these cookies are sure to satisfy every chocolate lover’s craving!
Print
Chocolate Chip Cookies
- Prep Time: 10 minutes
- Cook Time: 16 minutes
- Total Time: 41 minutes
- Yield: 12 cookies
- Category: Dessert
- Method: Baking
- Cuisine: Cookies
- Diet: Vegetarian
Description
These Pan-Banging Chocolate Chip Cookies are thick, chewy, and irresistibly gooey! The pan-banging technique creates crisp edges and soft, doughy centers, making them perfect for any chocolate lover.
Ingredients
- For the Cookies:
- 2 cups all-purpose flour (fluffed then leveled)
- 1/2 tsp baking soda
- 3/4 tsp salt
- 1 cup (2 sticks) unsalted butter, room temperature
- 1 1/2 cups granulated sugar
- 1/3 cup packed light brown sugar
- 1 large egg
- 1 large egg yolk
- 2 tsp pure vanilla extract
- 2 tbsp water
- 8 oz semi-sweet chocolate, chopped into bite-sized pieces (averaging 1/2 inch, some smaller, some larger)
- Flakey sea salt for garnish
Instructions
- Preheat the oven: Adjust an oven rack to the middle position and preheat the oven to 350°F (175°C). Line 3 baking sheets with parchment paper or silicone baking mats.
- Mix dry ingredients: In a small bowl, whisk together the flour, baking soda, and salt.
- Cream the butter and sugars: In the bowl of a stand mixer fitted with a paddle attachment, beat the butter on medium speed until creamy. Add the granulated sugar and brown sugar, and beat on medium-high speed until light and fluffy, about 2–3 minutes.
- Add wet ingredients: Add the egg, egg yolk, vanilla extract, and water to the butter-sugar mixture. Mix on low speed until combined.
- Combine dry and wet ingredients: Gradually add the flour mixture to the wet ingredients, mixing on low speed until just combined.
- Stir in the chocolate: Stir in the chopped semi-sweet chocolate chunks until evenly distributed throughout the dough.
- Form dough balls: Form the dough into 3 1/2-ounce balls (about a heaping 1/3 cup each) and place them on the prepared baking sheets. Space the dough balls evenly apart. You’ll need to place 4 dough balls per baking sheet.
- Chill the dough: Transfer the baking sheets with the dough balls to the freezer and chill for at least 15 minutes before baking.
- Bake the cookies: Place one chilled baking sheet in the preheated oven and bake for 10 minutes, or until the cookies are slightly puffed in the center.
- Create the ridges: Carefully lift the side of the baking sheet about 4 inches and gently let it drop down against the oven rack, so the edges of the cookies set and the inside falls back down. Repeat this lifting and dropping process a few times to create ridges around the edge of the cookie.
- Cool and garnish: Let the cookies cool on the baking sheets for a few minutes before transferring to a wire rack. Garnish with flakey sea salt.
Notes
- Storage: Store leftover cookies in an airtight container at room temperature for up to 4 days.
- Reheating: Reheat in the microwave for 10–15 seconds for a warm, gooey experience.
- Variations:
- Add-ins: Add nuts like walnuts or pecans for extra crunch and flavor.
- Dark Chocolate: Swap out the semi-sweet chocolate for dark chocolate for a richer taste.
- Flavor Boost: Add a pinch of cinnamon or a splash of espresso powder to enhance the flavor of the chocolate.
Nutrition
- Serving Size: 1 cookie
- Calories: 180
- Sugar: 16g
- Sodium: 120mg
- Fat: 10g
- Saturated Fat: 6g
- Unsaturated Fat: 4g
- Trans Fat: 0g
- Carbohydrates: 22g
- Fiber: 1g
- Protein: 2g
- Cholesterol: 25mg

